Building further on the custom FLV player in previous posts, and definitely inspired by the BBC iPlayer, I decided to add further functionality, including a mute control to turn off the sound for a video currently playing.
The ActionScript is really very simple, and logical. Once you understand how to stream and attach video, attaching sound for control is very straight forward.
Quick recap
The original code required you to create a netConnection object and attach to that a netStream object:
//Net connection for video stream to video object
var myConnection_nc:NetConnection = new NetConnection();
myConnection_nc.connect(null);
var video_ns:NetStream = new NetStream(myConnection_nc);
Then you were instructed to attach the video stream to a video object on the stage:
this.vidHolder_mc.vid_video.attachVideo(video_ns);
Attaching audio
Setting up to control (or mute) the audio is not all that different. Use the following code:
//Attach audio of FLV for volume control
flv_mc.attachAudio(video_ns);
var audio_sound:Sound = new Sound(flv_mc);
Notice that the video and the audio both attach the same netStream object video_ns. While the audio will still be heard without attaching it separately, if we want to control it, we must attach it to a movie clip of its own as above. In this case a movie clip called flv_mc.
Controlling audio
Because we want a mute button that will change depending on the mute status (showing whether the sound is currently muted or not - visual feedback is such a wonderful thing), you need to create a variable to store the current mute status.
Insert the following code right at the top of your ActionScript:
//Mute control status, 0 = mute off sound on
var mutestatus = 0;
Then you need to create a movie clip to act as the mute button. This has just two frames, one containing an image of a speaker making noise, the other containing an image of a speaker not making noise (decide how to depict this however you like). Give the first frame the label muteon and the second frame the label muteoff. Don't forget to put a stop(); action on each of the frames or you will have an animated flickering button. Then drag an instance of the mute button onto the stage and give it the instance name mute_mc.
The following code will then allow you to mute and un-mute the sound, insert this at some point after the line you just inserted above:
//Mute control
_root.mute_mc.onRelease = function() {
if (mutestatus == 0) {
_root.mute_mc.gotoAndStop("muteon");
mutestatus = 1;
audio_sound.setVolume(0);
updateVolume();
} else if (mutestatus == 1) {
_root.mute_mc.gotoAndStop("muteoff");
mutestatus = 0;
audio_sound.setVolume(100);
updateVolume();
}
};
How does it work? Very simple. First it checks to see what the mute status is (whether it is muted yet or not). If it is not muted, it tells the button to look like it is muted (goes to the frame with the muted speaker picture), then sets the mute status to 1, then sets the volume to be 0, then updates the volume to make the 0 take effect. If, however, it is already muted, it tells the button to look like it is not muted (goes to the frame with the noisy speaker picture), then sets the mute status to 0, then sets the volume to be 100, then updates the volume to make the 100 take effect.
And that's a wrap.
Monday, 23 February 2009


Wednesday, 18 February 2009
Being inspired by historical art and design...
(I have published this article on another of my blogs, so sorry if you have seen it before.)
Too often I hear students moaning that historical sources are boring, uninspiring, and in some cases irrelevant to the world of contemporary graphics. More often than I am comfortable with students would rather study their peers on Deviant Art than their superiors in an art gallery.
While I do understand what my students are saying, from their point of view, I suggest that the problem is not with the historical art, but in our misconceptions about how we think other people's artwork should influence or inspire us.
Take the video for Coldplay's Viva La Vida for example. A fantastic piece of contemporary art & design, packed with modern digital effects, almost totally inspired visually by 19th Century oil paintings.
See if you agree...
Take a close look. You will see animated painterly effects, cracks in the image like the crazing in an old painting, the dress of the performers, the props, the colours and yes, even the lighting, all influenced by oil paintings nearly 200 years old.
Compare the colours and lighting from the video with this portrait of Nelson. The similarities are striking.
 Other examples of paintings from the same era follow. Do you see similarities with these too?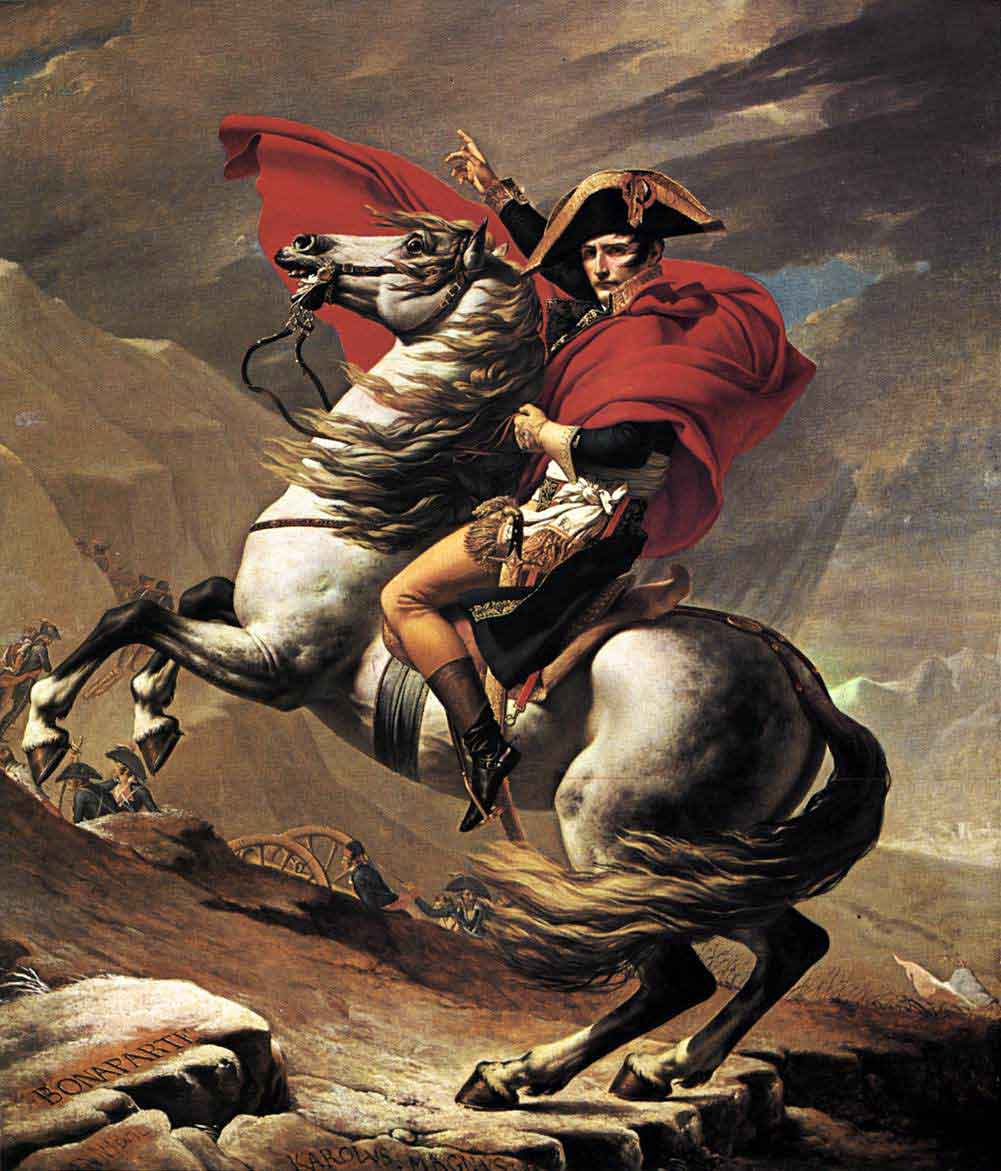


As you watch the video you will have seen many visual elements borrowed from paintings like those above. They have taken the visual language of these paintings and used it in the video.
One painting in particular that appears to inspire the video is the one on the cover of the "Death and All His Friends" album. It features a painting entitled "Liberty Leading the People". It was painted in 1830 by Eugène Delacroix in oil on canvas and currently resides in the Louvre museum in Paris. But if you look closely as the video plays, you will notice a lot of the background imagery appears to be either taken from or inspired by this painting (watch out for the red flag imagery, and towards the end, "Liberty" herself).

What is my point? Just because you are asked to find examples of historical art for research does not mean you will have to produce an oil painting. For inspiration you might take colours, texture, lighting, composition, style, story telling, imagery, semiotics, mood, effects... anything you like.
You don't have to feel like you need to be inspired to use the media or technique - though you might be.
Inspiration comes in many ways from many sources. Do you have the eye to look beyond the surface? If you have, you may yet produce great things, original things, that go beyond the graphical fashion of the now.
The Coldplay video proves my point. So look deeper.
Monday, 16 February 2009
Where Interactive Media Can Go
Those of you who are old enough may remember back in 1993 a revolutionary new computer game was released - MYST. Back then it used the Mac's hypercard system (you know, the one that might have been a forerunner to the internet if only anyone had realised the potential of linking between stacks on other machines), simple yet effective.
As far as today's interactive media is concerned, the original MYST was pretty low tech. When I consider the simplicity of the original MYST back end it becomes clear that pretty much anyone with an intermediate knowledge of Flash and Actionscript could produce a comparable game today.
What set MYST apart then wasn't the technology, but the creativity with which the technology was used.
And this is what I keep trying to get my students to understand. It isn't all about being able to use the software, loads of people can do that. It is about the thinking, the ideas and the creativity.
That is why we emphasise the design process over the final outcome.
Of course later versions of MYST are a lot more complex than the original in 1993, but the ideas, the thinking and the creativity is still what drives the process, even if the technology has changed.
As demonstrated in this making of video...
The Making Of Myst Iii Exile via Noolmusic.com
As far as today's interactive media is concerned, the original MYST was pretty low tech. When I consider the simplicity of the original MYST back end it becomes clear that pretty much anyone with an intermediate knowledge of Flash and Actionscript could produce a comparable game today.
What set MYST apart then wasn't the technology, but the creativity with which the technology was used.
And this is what I keep trying to get my students to understand. It isn't all about being able to use the software, loads of people can do that. It is about the thinking, the ideas and the creativity.
That is why we emphasise the design process over the final outcome.
Of course later versions of MYST are a lot more complex than the original in 1993, but the ideas, the thinking and the creativity is still what drives the process, even if the technology has changed.
As demonstrated in this making of video...
The Making Of Myst Iii Exile via Noolmusic.com
Saturday, 10 January 2009
Functions, functions, functions
Being originally trained in graphic design, I missed out on formal training in computer programming. The subtleties of programming were all self taught and learned as needed, rather than learned in a logical and structured way. This, and the fact that I come from an art background (definately part of seeing the world a little differently) perhaps explains why I tend to come onto programming solutions to my interactive media problems in a round-about way.
The purpose and value of functions is a perfect example of this. A programmer could probably explain it to me until they were blue in the face, but in fact the best explanation I have ever had came accidentally in two halves, while actually looking for a solution to something else.
The following is actually bits taken from two different chapters in the Flash MX 2004 ActionScript reference ("Using built-in functions" and "Returning values from a function"). Why they didn't just explain it this way in the first place I will never know. Still, if having it explained this way makes sense to you I share it below for your benefit:
The purpose and value of functions is a perfect example of this. A programmer could probably explain it to me until they were blue in the face, but in fact the best explanation I have ever had came accidentally in two halves, while actually looking for a solution to something else.
The following is actually bits taken from two different chapters in the Flash MX 2004 ActionScript reference ("Using built-in functions" and "Returning values from a function"). Why they didn't just explain it this way in the first place I will never know. Still, if having it explained this way makes sense to you I share it below for your benefit:
A function is a block of ActionScript code that can be reused anywhere in a SWF file. If you pass values as parameters to a function, the function will operate on those values. A function can also return values.
To call a function, simply use the function name and pass any required parameters.
For example, the following function returns the square of the parameter x and specifies that the returned value must be a Number:
function sqr(x:Number):Number {
return x * x;
}
Some functions perform a series of tasks without returning a value. For example, the following function initializes a series of global variables:
function initialize() {
boat_x = _global.boat._x;
boat_y = _global.boat._y;
car_x = _global.car._x;
car_y = _global.car._y;
}
Saturday, 3 January 2009
More Coding for Fun (while still solving the design problem)
Well, as usual I take the opportunity in the holidays to practice and develop my Interactive Media skills. Last time I made a Ukulele Tuner, this time, prompted by a relatives' purchase of a OO gauge railway for Christmas (and my own love of making things and building models) I put together a program to speed up scale calculations to make it easier for me when (and if) I find time to make scale model buildings for my relatives' railway.
Here it is produced in Flash with ActionScript, graphics produced in Fireworks and exported as PNG 32. Ultimately I will compile it into a windows executable using Zinc or Flash Studio once it has been thoroughly tested:
The model railway community on the Model Rail Forum, the New Railway Modellers forum and the Model Railway Forum were very helpful. Although I like to make models when I have time, I am by no means an OO or even a model railway expert at this point in time, so input from the potential user base was absolutely vital.
I guess the lesson I would want my students to take from this is that you don't have to be an expert in a field to successfully design for it. But you do have to do thorough research and be genuinely interested in learning about the field and learning about what is important to your client/the user. If you haven't learned to be interested you may find that what you produce meets the needs of precisely no-one - and you won't even get paid.
This lesson was summed up nicely by a designer who has influenced my approach to creative practice, Ivan Chermayeff. In a long time ago interview with ID magazine (I think it was ID), in an article called "Design: Another Reconsideration", Ivan simply states that "designers should be interested in everything" (para).
I think he is right. Almost the one industry a designer will not design for is his or her own industry. They will be employed to design for a variety of other industries throughout their career however, so an interest in other people's area of expertise is vital. After all, design is about problem solving (another lesson from Chermayeff), so designers need to be interested in the problems and get inside them, because as Ivan once described - solutions come directly out of an understanding of the problems (para).
That's why my research took me directly to the community of model railway enthusiasts. Because in talking to them (here, here and here) I would come to correctly understand the problem (the issues surrounding calculating scale conversions for model railways, the scales themselves, what the user needs it to do etc.) Once I understood the problem, the solution was pretty much obvious, all I had to do was apply my new understanding to the interface, visual appearance and make it work.
And the result? The community feedback was positive about the current version, so I know I have been successful. While a few suggestions for even further development have since been made, for now I have a working product that actually meets my own needs, and the needs of real live users.
Only possible, because the users were consulted about the design problem, and their input turned into a solution. Problem solved.
Here it is produced in Flash with ActionScript, graphics produced in Fireworks and exported as PNG 32. Ultimately I will compile it into a windows executable using Zinc or Flash Studio once it has been thoroughly tested:
The model railway community on the Model Rail Forum, the New Railway Modellers forum and the Model Railway Forum were very helpful. Although I like to make models when I have time, I am by no means an OO or even a model railway expert at this point in time, so input from the potential user base was absolutely vital.
I guess the lesson I would want my students to take from this is that you don't have to be an expert in a field to successfully design for it. But you do have to do thorough research and be genuinely interested in learning about the field and learning about what is important to your client/the user. If you haven't learned to be interested you may find that what you produce meets the needs of precisely no-one - and you won't even get paid.
This lesson was summed up nicely by a designer who has influenced my approach to creative practice, Ivan Chermayeff. In a long time ago interview with ID magazine (I think it was ID), in an article called "Design: Another Reconsideration", Ivan simply states that "designers should be interested in everything" (para).
I think he is right. Almost the one industry a designer will not design for is his or her own industry. They will be employed to design for a variety of other industries throughout their career however, so an interest in other people's area of expertise is vital. After all, design is about problem solving (another lesson from Chermayeff), so designers need to be interested in the problems and get inside them, because as Ivan once described - solutions come directly out of an understanding of the problems (para).
That's why my research took me directly to the community of model railway enthusiasts. Because in talking to them (here, here and here) I would come to correctly understand the problem (the issues surrounding calculating scale conversions for model railways, the scales themselves, what the user needs it to do etc.) Once I understood the problem, the solution was pretty much obvious, all I had to do was apply my new understanding to the interface, visual appearance and make it work.
And the result? The community feedback was positive about the current version, so I know I have been successful. While a few suggestions for even further development have since been made, for now I have a working product that actually meets my own needs, and the needs of real live users.
Only possible, because the users were consulted about the design problem, and their input turned into a solution. Problem solved.
Friday, 10 October 2008
Switches and Key Listeners for Game Controls
Well I just can't help fiddling around with code to see what I can do. I began toying with making some kind of game where you control a craft of some kind and must avoid the bad things and pick-up the good things.
Rather than dive straight into graphics I followed the best practice and began making the code work first. What follows is the simple beginnings of a game control script that uses a key listener object to check what key the player is using. Then, instead of using if else as I might usually be tempted to do I decided to use a switch to check which key is being pressed and change the direction of acceleration accordingly. For this to work for you, all you need to do it dump a movieclip onto the stage with the instance name "ship_MC", then copy the following code into your first key frame:
/*Up, down, left and right keys control direction. Space is the emergency brake.*/
/*Set initial values for direction and speed, and the rate of acceleration */
xspeed = 0;
yspeed = 0;
accelerate = 1;
/*Create the key listerner object*/
var myControlKeyListener:Object = new Object();
/*Set up a conditional response to the key press that changes the value of xspeed and yspeed depending on which key is being pressed and for how long.*/
myControlKeyListener.onKeyDown = function() {
switch (Key.getCode()) {
case Key.SPACE :
trace("space");
xspeed = 0;
yspeed = 0;
break;
case Key.LEFT :
trace("left");
xspeed -= accelerate;
break;
case Key.UP :
trace("up");
yspeed -= accelerate;
break;
case Key.RIGHT :
trace("right");
xspeed += accelerate;
break;
case Key.DOWN :
trace("down");
yspeed += accelerate;
break;
}
};
/*Add the key listener*/
Key.addListener(myControlKeyListener);
/*Animate the direction and velocity of the ship_MC movie clip according to the value of xspeed and yspeed */
onEnterFrame = function () {
this.ship_MC._x += xspeed;
this.ship_MC._y += yspeed;
};
The comments between the /* */ in the code above explain how it works. If you have not used switch before, and tend to stick to if else you will find in some cases that switch is much easier to work out the logic for and takes less typing.
Demo SWF
Rather than dive straight into graphics I followed the best practice and began making the code work first. What follows is the simple beginnings of a game control script that uses a key listener object to check what key the player is using. Then, instead of using if else as I might usually be tempted to do I decided to use a switch to check which key is being pressed and change the direction of acceleration accordingly. For this to work for you, all you need to do it dump a movieclip onto the stage with the instance name "ship_MC", then copy the following code into your first key frame:
/*Up, down, left and right keys control direction. Space is the emergency brake.*/
/*Set initial values for direction and speed, and the rate of acceleration */
xspeed = 0;
yspeed = 0;
accelerate = 1;
/*Create the key listerner object*/
var myControlKeyListener:Object = new Object();
/*Set up a conditional response to the key press that changes the value of xspeed and yspeed depending on which key is being pressed and for how long.*/
myControlKeyListener.onKeyDown = function() {
switch (Key.getCode()) {
case Key.SPACE :
trace("space");
xspeed = 0;
yspeed = 0;
break;
case Key.LEFT :
trace("left");
xspeed -= accelerate;
break;
case Key.UP :
trace("up");
yspeed -= accelerate;
break;
case Key.RIGHT :
trace("right");
xspeed += accelerate;
break;
case Key.DOWN :
trace("down");
yspeed += accelerate;
break;
}
};
/*Add the key listener*/
Key.addListener(myControlKeyListener);
/*Animate the direction and velocity of the ship_MC movie clip according to the value of xspeed and yspeed */
onEnterFrame = function () {
this.ship_MC._x += xspeed;
this.ship_MC._y += yspeed;
};
The comments between the /* */ in the code above explain how it works. If you have not used switch before, and tend to stick to if else you will find in some cases that switch is much easier to work out the logic for and takes less typing.
Demo SWF
Monday, 1 September 2008
Flash Projects - #4 - Custom Video Player Dynamic Menu
I am typing late on this one, so I will probably re-write it for clarity in a few days. Meanwhile I hope you find it helpful.
Having programmed a custom FLV player in Flash, I wasn't satisfied with hard coded video selection menu. This would mean that whenever I want to add another video would I need to edit the source file, add another button, add the actionscript for the button, recompile the movie and re-upload the movie - with all the attendant cacheing issues. Not a great approach.
Better would be to have the video selection menu generate itself dynamically from data in an XML file. This way I would only have to compile the video player once, but could update the menu by uploading a new XML file.
I hunted down some code on the web (I forgot the URL or I would link to it), it didn't work but with a minor tweak I was left with the following:
xStart = 0;
yStart = 0;
bWidth = 101;
bHeight = 35;
menuXml = new XML();
menuXml.ignoreWhite = true;
menuXml.onLoad = loadVidData;
menuXml.load("menu.xml");
function loadVidData() {
for (var i = 0; i<this.firstchild.childnodes.length; i++) {
var bn = this.firstChild.childNodes[i].attributes.buttonName;
var b = _root.menuHolder_mc.attachMovie("button", bn, i);
b._x = xStart;
b._y = yStart+(bHeight*i);
b.txt = bn;
b.onPress = function() {
//trace(this.txt);
_root.video_ns.play(this.txt+".flv");
currentvid = this.txt+".flv";
_root.heading = this.txt;
};
}
}
Essentially it sets a few variables to start with - the starting co-ordinates of the menu when it builds (xstart and ystart), and the dimensions of the buttons that make up the menu (bWidth and bHeight). You can set your own values for these to suite your design.
Then it creates an XML object and loads an XML file called "menu.xml". If you choose to name your XML file differently, make sure you change it in the Actionscript too.
The next part builds the menu based on the content of the XML file by attaching a copy of the button library item (more about this later) for each entry in the XML file. It positions each button one below the other based on the bHeight value you set earlier.
The text on each button is also taken from the XML file variable txt.
Then we have the Actionscript that tells the button what to do when clicked. In this case it tells the video_ns netstream object to play a file with the name defined by the XML variable txt. (The Actionscript adds the file extension .flv to the end of the value defined in the XML variable txt).
We also set the currentvid variable (purpose explained in the other tutorial).
Finally we set a variable called heading to have the same value as the XML variable txt. This is used to display the title of the video in a dynamic text box.
Putting It All Together
The Menu
First create a movie clip to be used in your menu as a button. This will be repeated vertically for each video file in the XML file. The button needs to have a dynamic text box on it to display the name of the video that will be shown when it is clicked. The variable name of the dynamic text box should be txt.
Right click the button in the library and select "linkage". Set the movie clip to export for Actionscript and give it the identifier "button".
Then create an empty movie clip on the stage, and give it the name menuHolder_mc. The script above will actually fill this empty movie clip with the menu, this makes it possible to adjust the position of the menu visually, by moving the positio of the menuHolder_mc movie clip. (It will also allow us to animate the movie clip in a future tutorial).
The Title
Create a dynamic text box with the variable name heading. Put it where you want it on the screen.
The XML File
Now the flash movie is done we need to format an XML file in such a way that the Flash movie will be able to parse it to make our menu. Sample XML code follows:
<?xml version="1.0" encoding="iso-8859-1"?>
<menu>
<menu buttonName = "Vid 1"/>
<menu buttonName = "Vid 2"/>
<menu buttonName = "Vid 3"/>
<menu buttonName = "Vid 4"/>
<menu buttonName = "Vid 5"/>
<menu buttonName = "Vid 6"/>
</menu>
You can enter as many <menu buttonName = "video file name without file extension goes here"/> lines as you like. Just make sure you put the exact file name, minus file extension. If, for instance, your file name is "Summer Holiday.flv" you put "Summer Holiday".
The Flash movie can cope with spaces in the filename, and don't forget, it is the filename that is being used to label the buttons, so I recommend you name your files with the title of the films and with spaces.
Let's face it, "Summer Holiday" reads a lot better than "holiday_video_001" on the video select menu.
Finishing Off
All you need to do is make sure the XML file, the Flash movie video player, and the FLV files listed in the XML file are all in the same folder. Then it should just work.
Anyway, as I said, it is pretty late (01:30am) for me, so I know the above is not as clear as it could be. I will rewrite in a few days.
Having programmed a custom FLV player in Flash, I wasn't satisfied with hard coded video selection menu. This would mean that whenever I want to add another video would I need to edit the source file, add another button, add the actionscript for the button, recompile the movie and re-upload the movie - with all the attendant cacheing issues. Not a great approach.
Better would be to have the video selection menu generate itself dynamically from data in an XML file. This way I would only have to compile the video player once, but could update the menu by uploading a new XML file.
I hunted down some code on the web (I forgot the URL or I would link to it), it didn't work but with a minor tweak I was left with the following:
xStart = 0;
yStart = 0;
bWidth = 101;
bHeight = 35;
menuXml = new XML();
menuXml.ignoreWhite = true;
menuXml.onLoad = loadVidData;
menuXml.load("menu.xml");
function loadVidData() {
for (var i = 0; i<this.firstchild.childnodes.length; i++) {
var bn = this.firstChild.childNodes[i].attributes.buttonName;
var b = _root.menuHolder_mc.attachMovie("button", bn, i);
b._x = xStart;
b._y = yStart+(bHeight*i);
b.txt = bn;
b.onPress = function() {
//trace(this.txt);
_root.video_ns.play(this.txt+".flv");
currentvid = this.txt+".flv";
_root.heading = this.txt;
};
}
}
Essentially it sets a few variables to start with - the starting co-ordinates of the menu when it builds (xstart and ystart), and the dimensions of the buttons that make up the menu (bWidth and bHeight). You can set your own values for these to suite your design.
Then it creates an XML object and loads an XML file called "menu.xml". If you choose to name your XML file differently, make sure you change it in the Actionscript too.
The next part builds the menu based on the content of the XML file by attaching a copy of the button library item (more about this later) for each entry in the XML file. It positions each button one below the other based on the bHeight value you set earlier.
The text on each button is also taken from the XML file variable txt.
Then we have the Actionscript that tells the button what to do when clicked. In this case it tells the video_ns netstream object to play a file with the name defined by the XML variable txt. (The Actionscript adds the file extension .flv to the end of the value defined in the XML variable txt).
We also set the currentvid variable (purpose explained in the other tutorial).
Finally we set a variable called heading to have the same value as the XML variable txt. This is used to display the title of the video in a dynamic text box.
Putting It All Together
The Menu
First create a movie clip to be used in your menu as a button. This will be repeated vertically for each video file in the XML file. The button needs to have a dynamic text box on it to display the name of the video that will be shown when it is clicked. The variable name of the dynamic text box should be txt.
Right click the button in the library and select "linkage". Set the movie clip to export for Actionscript and give it the identifier "button".
Then create an empty movie clip on the stage, and give it the name menuHolder_mc. The script above will actually fill this empty movie clip with the menu, this makes it possible to adjust the position of the menu visually, by moving the positio of the menuHolder_mc movie clip. (It will also allow us to animate the movie clip in a future tutorial).
The Title
Create a dynamic text box with the variable name heading. Put it where you want it on the screen.
The XML File
Now the flash movie is done we need to format an XML file in such a way that the Flash movie will be able to parse it to make our menu. Sample XML code follows:
<?xml version="1.0" encoding="iso-8859-1"?>
<menu>
<menu buttonName = "Vid 1"/>
<menu buttonName = "Vid 2"/>
<menu buttonName = "Vid 3"/>
<menu buttonName = "Vid 4"/>
<menu buttonName = "Vid 5"/>
<menu buttonName = "Vid 6"/>
</menu>
You can enter as many <menu buttonName = "video file name without file extension goes here"/> lines as you like. Just make sure you put the exact file name, minus file extension. If, for instance, your file name is "Summer Holiday.flv" you put "Summer Holiday".
The Flash movie can cope with spaces in the filename, and don't forget, it is the filename that is being used to label the buttons, so I recommend you name your files with the title of the films and with spaces.
Let's face it, "Summer Holiday" reads a lot better than "holiday_video_001" on the video select menu.
Finishing Off
All you need to do is make sure the XML file, the Flash movie video player, and the FLV files listed in the XML file are all in the same folder. Then it should just work.
Anyway, as I said, it is pretty late (01:30am) for me, so I know the above is not as clear as it could be. I will rewrite in a few days.
Subscribe to:
Posts (Atom)

 Posts
Posts


