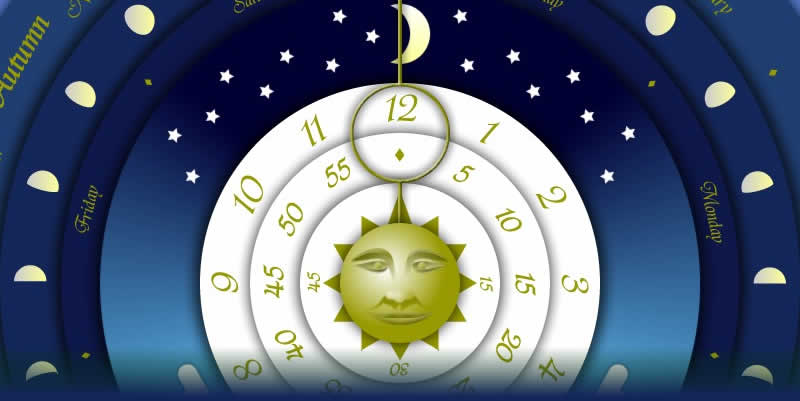
Showing posts with label Flash. Show all posts

Monday, 22 October 2012

Mouse Wheel Animation Control with Easing

The previous post gives a simple ActionScript 2 solution for using the mouse wheel to control forward and backward play along the Flash timeline.

This example extends that to introduce an element of easing. When the user stops scrolling the mouse wheel, instead of coming to an immediate halt, the animation gently glides to a stop.

var damping = 0.95;
var accelerator = 0; //equivalent to movieclip frames per framerate frame

//detect mouse scroll
var mouseListener:Object = new Object();
mouseListener.onMouseWheel = function(delta)
{
accelerator += delta/3;
};
Mouse.addListener(mouseListener);

//manage the animation
onEnterFrame = function ()
{
accelerator = accelerator*damping;
framespeed = Math.round(accelerator);
moveframe = clip_mc._currentframe + framespeed;
clip_mc.gotoAndStop(moveframe);
};


And there you have it. Play a MovieClip animation with speed and direction determined by the direction the user scrolls the mouse wheel. And when the mouse wheel is released the animation slowly comes to a halt.

Happy days.

Controlling Flash Animation Frame, Direction and Speed with Mouse Scroll

Most animations just play, you set their frame rate, your press play, and away they go. But I have an interactive item that I want users to be able to play forwards, or backwards, at the speed they scroll their mouse.

I am using ActionScript 2 for this, and the code is blissfully simple:
var mouseListener:Object = new Object();
mouseListener.onMouseWheel = function(delta) {
     frame = (clip_mc._currentframe + delta);
     clip_mc.gotoAndStop(frame);
}
Mouse.addListener(mouseListener);

As you can see you just create a mouseListener object and then build a function that acts on the onMouseWheel event.

When the mouse is rolled the 'delta' (or the value of the mouse scroll, forward or backwards) is used to calculate a new position in a MovieClip's timeline based on the current frame. The function then moves the play head using gotoAndStop to that new position in the timeline.

And you're done... This can be used to control the speed and direction of animation play within a MovieClip. I have a few creative applications of this technique in mind for the future - I hope you find it helpful. Happy scrolling.

Monday, 9 April 2012

Getting used to code free game development

Not too long ago I began a games design course to formalise and extend my knowledge and skill in this area of interactive media. The interactive media of my earlier career has evolved over the last decade into what I recognise are two distinct areas. While web design has been around for longer than that, it's earlier "1.0" incarnation was barely able to support what might be termed "interactive media", which back then was pretty much the sole domain of CD ROMs. With the development of Broadband, faster computers, and browser technology, what used to be delivered on CD or DVD is now easily obtained online - so that now interactive media = web design (to a great degree). The other direction of the interactive media industry then, still delivered on hard media, is Games. Since I know web design and Flash fluently, I decided to make the move in the direction of game.

The introductory part of the course, like many courses, assumes little or no knowledge. So we are using Yoyo's Game Maker as the initial authoring tool to learn basic development concepts. Powerful though Game Maker is, I do find the "code free" development slightly frustrating. I finally find myself at the other end of the ladder than I was 13 years ago. Back then I would have given anything to be able to build games, or any complex interactive media, without having to write a line of code. Since then I have got down to it and learned a great deal of ActionScript and such like over the years, and now find the coding aspect logical and sensible. Now I am forced to use a GUI to drag icons around to make "code" I find it frustrating, but am getting used to it.

Take this example for instance:


The visual equivalent took a bit more thought to drag together, than the ActionScript based syntax I am now used to. It's partly because of being unfamiliar with where to look for the draggable items, and partly because it would just be quicker to type.

I laugh to myself because now I finally understand what my coding whiz brother, and others like him, were thinking when I took delight in code free authoring environments all those years ago. They found them slow in comparison to coding by hand. And now... so do I.

Does this mean I have arrived?

Meanwhile, I am getting used to Game Maker, and I understand I am able to code by hand if I want to so I am happy to recommend this excellent product. Tally ho!

Tuesday, 18 October 2011

Game Development - High Score Leader Boards in Flash

One way of increasing the repeat appeal of a game, particularly for 1 player games, is to include a leader board of high scores. This gives the player an additional goal of beating their previous best score, allowing them to compete with themselves, and other players, even if the game has only 1 player mode.

As long as your game stores the player's score under the variable "score" this example should provide a good starting point for your own leader board or high score board.

In this example I am using ActionScript 2.0 in Flash.

The Code

The code for this is split into 3 parts. First we create a multidimensional array for keeping the scores and player signatures. Second, we store the score from the game, third we create the leader board that transfers data in and out of the array.

Part 1 - Create a Multidimensional Array

In my game the leader board only shows the top 10 scorers. For each one it displays the score and a 3 character signature from the player.

Before we can store data we need to create the place to store it. In this case I am using a multidimensional array. Multidimensional because I want to store 10 elements (1 for each of the top 10) with 2 data elements (score and signature) per player. Doing it this way allows me to sort them later based on score so I can display them from highest scorer to lowest scorer.

My approach was as follows:

/*NEW ARRAY*/
/*Make a new array object*/
var leaderboard_array:Array = new Array ();
/*'Push' data elements onto the array*/
leaderboard_array.push ({initials:"---", score:"0"});

This code must run only once, run it again and you will add to the end of your array, eventually making it huge.

In effect we create an array of 10 elements, that each contain an array of 2 elements. An array within an array. Using the approach I have, where I have named each 'sub'-element "initials" and "score" means that later I can refer to these directly by name - which makes coding a bit easier to do and debug.

My new array includes pre-coded default values, this means something will display the first time and we don't get a blank leader board.

Part 2 - The Game

Your game is your own. The important thing is that you store the players "score" at the end of the game.

Because the my_array.sort(Array.NUMERIC)in Flash does not work correctly (see here), we cannot use strict datatyping  when we define our variables. So, when you first define the "score" variable, all you need to do is:

var score = 0;

Don't do:

var score:Number = 0;

Or the code won't work later, when we have to treat "score" as a string for sorting.

When the game is over, just make sure you store the player's score in the "score" variable, e.g.:

score = endgamescore;

Part 3 - The Leaderboard

At this point we have an array, and a "score". In this part of the program we need to do the following as essential elements.

a. Test whether the player's latest "score" is greater than the lowest score on the current leader board.
b. If it is, allow the player to input a 3 character signature and store it, along with the "score" in the array replacing the previous lowest score.
c. Sort the array by score so each one is listed in order of greatness.
d. Display the contents of the array in text box to show the leader board to the player.

There is more to it than that, especially since sorting numerically in Flash is not actually possible by direct means - I have gone into detail on that on another post - so much of the code is required to solve that problem.

The following code relies on the stage containing:

1. A text input box with the instance name "initials_txt"
2. A button with the instance name "button_btn"
3. A dynamic text box with the instance name "lb_txt"

The code is then as follows:

/* vars */
/* strict datatyping is off for score and sortscore in order to sort it due to restriction in Flash */
var sortscore = 0;
var initials:String = "";
/*set character limit on input text*/
_root.initials_txt.maxChars = 3;
/*PRE-POPULATE LEADERBOARD WITH CURRENT DATA FROM ARRAY*/
for (var i = 0; i < leaderboard_array.length; i++) {
    _root.lb_txt.text += leaderboard_array[i].initials + " " + leaderboard_array[i].score + "\n";
}
/*ADD NEW SCORE ON SUBMIT*/
_root.button_btn.onPress = function () {
    /* get player name value*/
    initials = _root.initials_txt.text;
    /*convert score to decimals ready for correct sorting*/
    sortscore = score / 10000;
    /*convert score values in array to decimals ready for correct sorting*/
    for (var i = 0; i < leaderboard_array.length; i++) {
        leaderboard_array[i].score = leaderboard_array[i].score / 10000;
    }

    /*sort current board by score - low to high*/
    leaderboard_array.sortOn ("score");
    /*if player score is higher than lowest score on board, replace it with player score and name*/
    if (sortscore > leaderboard_array[0].score) {
        _root.leaderboard_array[0].initials = initials;
        _root.leaderboard_array[0].score = sortscore;
    }
    /*sort again to position the new score and initials correctly in order compared to other scores in array*/
    leaderboard_array.sortOn ("score");
    /*convert all the 'decimaled' scores back again to real scores*/
    for (var i = 0; i < leaderboard_array.length; i++) {
        leaderboard_array[i].score = leaderboard_array[i].score * 10000;
    }
    /*reverse the order of the array to show scores from high to low*/
    leaderboard_array.reverse ();
    /*clear existing text from the leader board text box*/
    _root.lb_txt.text = "";
    /*print new array content to the leader board text box*/
    for (var i = 0; i < leaderboard_array.length; i++) {
        _root.lb_txt.text += leaderboard_array[i].initials + " " + leaderboard_array[i].score + "\n";
    }
};

That's the main thrust of it - read the comments in the code to see what each lump of code is doing. Of course there is scope to develop on this yourself, but I hope this helps. Happy leader board-ing.

Friday, 29 April 2011

Convert Flash to HTML5 with Adobe Wallaby

.NET magazine reports this month that Adobe has released a "Flash-to-web-standards converter" called Wallaby, that basically takes your FLA file and spits out standards compliant HTML5 with accompanying JavaScript.

I must say I was waiting for Adobe to make a move like this ever since Apple got the mardies and decided to not support the Flash Player on its mobile devices. But I thought it might be a feature of CS6, I didn't expect it to be a free Adobe AIR app that I could download today.

.NET quotes senior product manager at Flash Professional as saying "Wallaby's initial focus is on converting banner ads and simple animations to HTML5, to cater for iOS, but that future development will be driven by consumer requirements..." buy .NET for more info.

So, while not expecting great shakes for some of my more advanced Flash work, I can't wait to see what it can do... I'm going to have a play.

Saturday, 9 April 2011

Experimenting with Sound in Flash - DJ Music Mixer


As soon as I realised the possibilities available with Sound Objects in Flash I realised that you could write a simple sound mixing app using ActionScript.

I started this experiment ages ago, but ran into a problem with the sound I couldn't solve straight away. 18 months later I remember it exists and blow the dust off to find the problem still waiting for me.

Just in case any one else has struggled with the same problem... I now have the solution, or at least know why that particular approach wouldn't work and have an alternative.

Once you set up a Sound Object you can either use attachSound to connect an embedded sound from your document Library, or you can use loadSound to load in an external MP3 file. But... and this is where I went wrong... you can't do both. In other words, if the first time you initialise the sound object you use attachSound you can't later change the sound using loadSound and expect it to behave normally. At least that was my experience.

My experimental app was a 2 channel audio mixer that used 2 Sound Objects, one for each channel. The mixing was done very simply by reducing the volume of one Sound Object while simultaneously increasing the volume of the other. So far so good.

However, for the Sound Objects to properly initialise, (and therefore the volume control code work properly) they needed to have a sound loaded into them straight away. The most obvious solution to me was to use attachSound to connect a sound embedded in the movie. So I made a couple of MP3s of 0 second duration and used those embedded within the app. Fine, the Objects initialised OK.

However, to be useful you need to be able to load external MP3s in, or it's only a 2 song show. And that's where the problem arose, because I would need switch from using attachSound to loadSound after the object initialised, and all of a sudden the volume control stops working as expected.

And that's what stumped me. It was only coming back with fresh eyes that allowed me to spot this discrepancy.

So, how to overcome it?

Simples - use loadSound from the first, but get Flash to load a non-existent sound by getting it to load nothing (e.g. ""). Sure, Flash will error, and complain it can't find the file, but the Sound Object will still initialise correctly - and the error is only visible when you test the movie from within the authoring software, not once exported.

Hey presto, when I load an external sound it all works, because I used loadSound all along and didn't change method later on. My music mixing app finally works.

It's possible there are other factors or other solutions - happy to hear about them, but that's how I got round it.

If it helps, happy to help.

Saturday, 2 April 2011

Graphically Displaying Yahoo Weather API Data in Flash


In my last post I looked at querying the Yahoo GEO and Weather APIs from within flash in order to return an XML file containing weather and forecast information.

Last time I simply pulled out the location and the weather condition text that gave a general description of the current weather. But actually the XML contains many more items than that. One of which is the prevailing temperature of the location being queried.

Displaying the temperature as text is relatively easy but you can also be more graphic, as in my virtual thermometer above.

In this prototype I am simply using the temperature data, which Yahoo provides as an integer, to determine the length of the 'mercury' in the thermometer.

How it was done

The Graphics

First I made all the pretty graphics in Fireworks (but you could use Photoshop, Paint.net, PhotoPlus etc.), and imported the assets into Flash. The important thing is that your scale (that's the Celcius and Farenheit rulers are correctly in line with each other, and the increments are spaced evenly on each scale).

To do this you need to understand the following:

-40C is the same as -40F (that's where the two scales meet)
0C is the same as +32F
+50C is the same as +122F

On that basis you should be able to construct C and F scales that line up the way they should. I did it by making two the same and then scaling the F scale smaller vertically so that -40 F and 122 F lined up with -40 C and 50 C respectively.

I also chose to run my scales from -40C to +50C because using the Yahoo Weather API I needed a scale that would reasonably take all global temperatures. I figure that somewhere might get close to -40C and somewhere might get up to +50C. If it turns out my scale isn't big enough I can always ammend it.

The 'Mechanics'

Once the graphics are in Flash I create a small red rectangle for the 'mercury' and turn it into a MovieClip (press F8) with the registration point at the bottom left, and with the instance name "liquid_mc". Then I create a transparent rectangle for the tube in which the 'mercury' travels and turn it into a MovieClip with the instance name "tube_mc" - this needs to be exactly the same height as the distance between the lowest temperature on your graphical scale (in my case -40C) and the highest temperature (in my case +50C) - for me this turned out to be 360 pixels, but it will vary depending on the size and shape of your graphical representation of the scale.

I place the two MovieClips on top of the graphic in the right place at the bottom of the graphical glass tube so when the the 'mercury' grows it will grow up from the bottom.

Then I select the graphic, the "tube_mc" and the "liquid_mc" and turn them all into a MovieClip with the instance name "thermometer_mc", so that "tube_mc" and "liquid_mc" are inside "thermometer_mc".

Finally, create a button, and add it to the stage with the instance name "submit_btn". Users will need to press this to run the query of the Yahoo API and display the result.

The Code

Then I create a new layer, give it the name 'actions' (so all my code is neatly in one place), and put in the following actionscript. Read my comments in the code to see what is happening:


stop ();
/*Thermometer*/
/*calculate the pixel height of 1 degree c by dividing the height of the thermometer tube by the number of degrees c it covers*/
var degree:Number = _root.thermometer_mc.tube_mc._height / 90;
/*calculate zero - because our thermometer starts at -40C we use this to ensure future calculations take account of this fact*/
var zero:Number = degree * 40;
/*Accessing the Yahoo API to find out the weather in any location using postcode and country code*/
/*set the search terms as variables, you can pull these from user input with some different ActionScript */
_root.submit_btn.onPress = function () {
var zip = "SW1A 1AA";
var country = "UK";
/*Find the WOEID*/
woeidXml = new XML ();
woeidXml.ignoreWhite = true;
/* run the loadWoeid function when the XML file loads that contains Yahoo's reply to our query below*/
woeidXml.onLoad = loadWoeid;
/* ASK QUESTION 1 - query the Yahoo API using YQL and the search terms above */
woeidXml.load ("http://query.yahooapis.com/v1/public/yql?q=select%20woeid%20from%20geo.places%20where%20text%3D%22" + zip + "%2C" + country + "%22&diagnostics=true");
/* this function will run when the XML file loads that contains Yahoo's reply to our query */
function loadWoeid () {
/*parse the XML response and store the woeid value as a variable in Flash called 'woeid'*/
woeid = woeidXml.childNodes[0].childNodes[1].childNodes[0].childNodes[0].childNodes[0];
/*find the WEATHER from the WOEID just gathered*/
/* we nest this function for question 2 within the function for question 1 because doing it this way means that question 2 is not asked until question 1 has an answer*/
weatherXml = new XML ();
weatherXml.ignoreWhite = true;
/* run the loadWeather function when the XML file loads that contains Yahoo's reply to our query below*/
weatherXml.onLoad = loadWeather;
/* ASK QUESTION 2 - query the Yahoo Weather API using the woeid we found out in question 1 above */
weatherXml.load ("http://weather.yahooapis.com/forecastrss?w=" + woeid + "&u=c");
/* this function will run when the XML file loads that contains Yahoo's reply to our query */
function loadWeather () {
/*parse the XML response and store the current temperature condition value as a variable in Flash called 'temp_xml'*/
temp_xml = weatherXml.childNodes[0].childNodes[0].childNodes[12].childNodes[5].attributes.temp;
/*set current temperature variable from XML*/
var temp_c:Number = temp_xml;
/*set height of the thermometer liquid_mc graphic based on the temperature extracted from the XML*/
_root.thermometer_mc.liquid_mc._height = (temp_c * degree) + zero;
}
}
};


As you will see, this is virtually the same code as in my previous post, the main difference is how we use the extracted data to change the height of a MovieClip that represents the 'mercury' in the thermometer. To find the temperature of a different location simply change the values of zip and country on lines 10 and 11.

I went a bit further (not explained in this post) and put in some text input fields so that the user can define their own location (maybe I will get time to explain that in a future post).

Meanwhile, happy temperature... er... displaying.

Monday, 21 March 2011

Finding the Weather with YQL and the Yahoo API

I spent some of this weekend examining the potential of the Google API for finding out the weather in my area. My long term aim is to include some nod to local weather in a Flash app I am working on. While the Google API was easy to tap into (see here) it is not very well documented and apparently unofficial and may change or vanish without warning (see discussion here) - which wouldn't bode well for inclusion in an app.

It was Jason Emerick's blog that pointed me towards the Yahoo API as an alternative with better documentation and official support. Now I have always been a fan of Google over Yahoo, but needing reliability I sloped over to Yahoo and revived my dormant account. It wasn't long before I was utterly convinced that Yahoo have an excellent API with excellent support, and a terrific console to help you try out your queries and test the results.

Differences between getting Google weather and Yahoo weather

While powerful, the Yahoo API didn't give me the weather information I was after with quite the same ease as the Google API. With the Google API all you needed to do is call the API URL and append your location to the end:

http://www.google.com/ig/api?weather=london,uk

The results are XML you can parse using your chosen language (in my case ActionScript).

Yahoo on the other hand isn't quite as straightforward (though much better once you get the hang of it). This is because you can't directly query Yahoo's weather API using your chosen location as you can with Google. Yahoo instead requires you to specify the WOEID (Yahoo's proprietary "Where On Earth ID") of the location you want to know the weather for.

Once you know the WOEID of the location, finding the weather for that location is as simple as:

http://weather.yahooapis.com/forecastrss?w=44418&u=c

WOEIDs appear to be an invention of Yahoo for identifying locations. Actually they are a really good idea, as it means your query will always work, even when places and names change.

The challenge is, of course, that most people won't know what the WOEID for their location is and so won't be able to use it to find out the weather in their area. I don't know my WOEID, that's for sure.

So we have to first find out our WOEID from our known location. You can do that like this:

http://query.yahooapis.com/v1/public/yql?q=select%20woeid%20from%20geo.places%20where%20text%3D%22SW1A%202AA%2Cuk%22&diagnostics=true

The Yahoo API console is very helpful in letting you experiment with the queries, and producing URLs like the one above for you to call in your code.

So knowing that with 2 questions I can still get the information I need from Yahoo, I felt more confident pressing ahead with the Yahoo API with its better documentation and promise to give 6 months notice to any changes. A far cry from Google's relative silence on the issue with their unofficial weather API.

Using ActionScript to query the Yahoo geo and weather APIs

So ultimately I have to ask 2 questions of Yahoo with my ActionScript. First - what is the WOEID for my location given as postcode, country? Second - what is the weather forecast for this WOEID?

For question 1 my ActionScript will use this query via the Yahoo YQL API to find out the location's WOEID:

http://query.yahooapis.com/v1/public/yql?q=select%20woeid%20from%20geo.places%20where%20text%3D%22SW1A 2AA%2Cuk%22&diagnostics=true

For question 2 my ActionScript will simply reference Yahoo's weather API using the WOEID from question 1 as a query term, resulting in an XML file containing weather information for the location represented by that WOEID:

http://weather.yahooapis.com/forecastrss?w=26355493&u=c

The trick with the ActionScript is to ask the questions in the right order, and to write your code so question 2 is not asked until it has the answer to question 1 (else you won't get a proper reply and your ActionScript won't get the XML it is expecting and will return 'undefined' where you were expecting the weather status).

Here's my solution, read the comments to see what I am doing there:


/*Accessing the Yahoo API to find out the weather in any location using postcode and country code*/
/*set the search terms as variables, you can pull these from user input with some different ActionScript */
var zip = "SW1A 2AA";
var country = "uk";
/*Find the WOEID*/
woeidXml = new XML ();
woeidXml.ignoreWhite = true;
/* run the loadWoeid function when the XML file loads that contains Yahoo's reply to our query below*/
woeidXml.onLoad = loadWoeid;
/* ASK QUESTION 1 - query the Yahoo API using YQL and the search terms above */
woeidXml.load ("http://query.yahooapis.com/v1/public/yql?q=select%20woeid%20from%20geo.places%20where%20text%3D%22" + zip + "%2C" + country + "%22&diagnostics=true");
/* this function will run when the XML file loads that contains Yahoo's reply to our query */
function loadWoeid () {
/*parse the XML response and store the woeid value as a variable in Flash called 'woeid'*/
woeid = woeidXml.childNodes[0].childNodes[1].childNodes[0].childNodes[0].childNodes[0];
/*test the value we have stored with a trace*/
trace (woeid);
/*find the WEATHER from the WOEID just gathered*/
/* we nest this function for question 2 within the function for question 1 because doing it this way means that question 2 is not asked until question 1 has an answer*/
weatherXml = new XML ();
weatherXml.ignoreWhite = true;
/* run the loadWeather function when the XML file loads that contains Yahoo's reply to our query below*/
weatherXml.onLoad = loadWeather;
/* ASK QUESTION 2 - query the Yahoo Weather API using the woeid we found out in question 1 above */
weatherXml.load ("http://weather.yahooapis.com/forecastrss?w=" + woeid + "&u=c");
/* this function will run when the XML file loads that contains Yahoo's reply to our query */
function loadWeather () {
/*parse the XML response and store the current weather condition value as a variable in Flash called 'condition_xml'*/
condition_xml = weatherXml.childNodes[0].childNodes[0].childNodes[12].childNodes[5].attributes.text;
/*parse the XML response and store the current weather place name value as a variable in Flash called 'place_xml'*/
place_xml = weatherXml.childNodes[0].childNodes[0].childNodes[6].attributes.city;
/*test the values we have stored with a couple of traces*/
trace (condition_xml);
trace (place_xml);
}
}


And that's a wrap. Ideally I wanted to get a single answer from Yahoo by linking the 2 questions in their API, but that proved difficult using just YQL because Yahoo would not provide weather data using YQL unless you knew the location (another apparently random code different again to the woeid) or you provided a US zip code (so no good to us Europeans). So I settled on this 2 stage solution that works for me.

Bugs or traits include being able to swap where I input a postcode with the name of a city, and you still get working results from Yahoo provided it has heard of the city.

Anyway, I know how I will use this, so if you have a use for this happy coding.

Addendum

Here's an implementation of the above code that takes user input and delivers the result.

Saturday, 19 March 2011

Annual Clock Flash App


Some projects are just plain fun. You get an idea, you get inspiration on how it should look, you research the maths that goes behind it and crack on until it is done. The Annual Clock is one such project for me. I actually finished it as a Flash application almost a year ago, but only just got round to converting it into a screensaver.

The Idea

Visually it was inspired by astronomical clocks of yester-year (such as the one below).


My aim however was not to portray the movement of heavenly bodies as much as it was to portray the passage of time in a more unique way than the standard hour, minute and second hands. Something about a clock that showed all layers of 'time' passing at once seemed an exciting and relatively unique prospect. My approach took a series of discs, each portraying a different element of time measurement, radiating out from the centre, with each disc moving progressively more slowly working from the instant, through seconds, minutes, hours, daylight, days, moon phases, months and seasons. I stopped there since the next levels (e.g. years, centuries, milleniums etc) would give the clock a lifespan, something I wanted to avoid. Rather than using hands I had the discs rotate instead, with the centre point representing the person - the instance of time in which we exist now.

But enough of concept.

The Maths

The code for the passage of time is pretty straightforward. You take the current computer system time and date, and use it to rotate the discs as a proportion of 360 degrees. Not too difficult. The tricky part was dealing with items that don't stick rigidly to our calendar such as Easter, the moon phases, and the solstices and equinoxes.

For the Easter calculation I did an ActionScript implementation of a formula on the BBC H2G2 website.

For the solstices and equinoxes I did an ActionScript implementation based on the astronomical algorithms of Jean Meeus (Astronomical Algorithms, 1st Ed., 1991) which someone had posted online somewhere (can't remember where now). Meeus's formulas calculate the date of the current year's solstices and equinoxes, but gives the result as a date using the Julian calendar. (In fact Meeus's formulas calculate the time of the events to within 4 minutes of actual with any error down to orbital perturbation - how cool is that?)

However a Julian date was not suitable for my needs, and meant some highly complex conversion from the Julian to the Gregorian calendar based on a formula published online by Utrecht University.

I confess I didn't understand most of the formulas (but then I am not an astrophysicist or mathematician - and I gave all sources their dues in my ActionScript comments). But that's the great thing about ActionScript's mathematical functions - if someone has written it out, it is fairly logical how you need to set up the same thing in ActionScript.

The moon phases are based on the mean moon phase duration as reported by NASA from the year 2000 (so it won't be perfect forever, but pretty good for this purpose).

So, my particular thanks go to Meeus, Utrecht University and NASA for helping me with the bit I could never work out on my own without some serious long term astronomical observations of my own. The practical upshot is a Flash based clock application that not only shows the passage of time from seconds to seasons, but also one that can predict Easter, the equinoxes and solstices, and understands that moon phases are not precisely 28 days long. Thanks folks.

Free Download
 
Feel free to visit the application page and download the v0.9 release as a screensaver.

Wednesday, 25 August 2010

Simple Platform Game Engine in Flash

This year my students will be learning about game engines. For 3D they will most likely use the Unreal Development Kit, along with 3DS Max/Carrara 8 Pro for content creation. But that's all 3D - what about the 2D games? Well, for 2D, my platform of choice is Flash.

Problem is, that unlike the UDK, or Unity, or even the FPSC, Flash is not a game engine - and that means, not only creating and scripting content for 2D games, but also scripting the whole engine.

It's something I have been meaning to do for a while. And while I know that many talented developers have posted Platform game solutions online, there is something about working through the problem yourself that I really like. Besides, I don't always get on well with other people's code - and if I am to teach my students to code their own, I need a solution I have worked out so I know it inside out and backwards and can really explain it to them.

Many of you will want the code now, but I am still fine tuning it. Meanwhile, here is version 4d as a peep of how it is going so far (I am currently on version 4f).

Controls:
JetPack = SPACE

Left = LEFT ARROW
Right = RIGHT ARROW
Climb Ladder = UP/DOWN ARROW


When it is finished I will post the code and an explanation.

Friday, 20 August 2010

Controlling Sounds

The basic way of including sound in your Flash movies is to add them to keyframes in the timeline. And this is fine for sounds that must coincide with animated events, or simple audio feedback on button rollovers. But if you want more sophisticated control over sounds, like starting and stopping them individually, or changing their volume, then you need to use ActionScript.

Preparing sound for ActionScript control

In Flash you can either load an external sound, or you can export sounds in your document Library for ActionScript. If you want to learn more about loading external sounds read my post on making an MP3 player in Flash. In this post I am going to just look at exporting sounds from the Library.

First off then you need to import all the sounds you need into your document Library of your .fla file. To do this click File > Import > Import to Library. Then browse for the sound file you need and click "OK". The sound will be imported into your Library. If you can't see your Library click CTRL+L (Cmd+L on the Mac).

Repeat this import step as often as you need to for every sound you need to appear in the Library.

Once they are imported you need to change their linkage settings to you can access the sounds with ActionScript. To do this right-click one of the sounds in the Library and choose linkage. When the Linkage Properties box opens tick the Export for ActionScript option, the Export in first frame will automatically be selected, this is fine. Then you need to give the sound an Identifier. By default the Identifier will be the same as the sound's original filename, but I find it helpful to give it an Identifier that makes it easy to remember what it is e.g. "backgroundmusic" or "whizzysound". Once you have given it a new Identifier you can click the "OK" button.

Repeat this step for every sound in the Library that you want to control with ActionScript.

Controlling sound with ActionScript

All this code should be added to the first frame of your Flash movie. I like to create a separate layer called "Actions" just for the code to keep it separate from other layers and so I know where all my code is when I want to edit it.

So far you have set some sounds in the Library to export for use with ActionScript and given those sounds Identifiers. Now we write the code to make use of those sounds.

Creating a sounds object and attaching a sound
First you create a sound object for each of the sounds you want to use, and then attach those library sounds to the objects. In this example let's pretend we have just one sound in the library with the identifier "backgroundloopsound". Here's how you create the sound object, and then attach "backgroundloopsound":


/* create a sound object */
var sound1_snd:Sound = new Sound(sound1_mc);

/* attach a sound from the library to the sound object */
sound1_snd.attachSound("backgroundloopsound");


In the above code I have created a sound object called "sound1_snd". I have given the object a target of sound1_mc which will allow me to control the sound independent of other sounds - but for this to work I must also add an empty MovieClip to the stage called "sound1_mc". I do this by creating a new MovieClip symbol in the library with nothing in it. Then I drag this symbol to the stage and give it the instance name "sound1_mc".

Then I have used "attachSound" to attach "backgroundloopsound".

Controlling the sound through the sound object

Now that we have a sound object with a sound attached, we can control the sound by controlling the object. Here are some examples.

Starting Sound

/* to make it play automatically, just put it in your code near the top */
sound1_snd.start(0, 100);


In the code above, the first 0 in the parenthesis means that the sound should be started at the beginning. If you have a 20 second sound, and you want to start it from 10 seconds in, then you should write sound1_snd.start(10, 100). The 100 in the parenthesis tells Flash how many times to loop the sound, when setting this, think about how long someone might stay on the scene and make sure you have enough loops or the sound will stop before they leave.

The previous start sound code starts the sound as soon as the frame loads in the flash movie. If you only want a sound to start when the user clicks a button, you need to first make the button and give it an instance name such as startSoundButton_btn, and you need to surround it by an event handler such as onPress:

_root.startSoundButton_btn.onPress = function () {
sound1_snd.start(0, 100);
}


Other ways of controlling sound

You can stop the sound:


sound1_snd.stop();


You can change the volume of the sound:


/* 0 = no volume, 100 = full volume, 50 = half volume etc... */
sound1_snd.setVolume(50);


If you want any of these to work when the user clicks a button, once again, you need to make a button and an event handler.

Here's an example


For this example I have 2 sounds in the library, one is a recording of me saying the word 'background" once. The other is a recording of me saying the word 'button' once. These were saved as WAVs and imported into the stage.

Then I right-clicked the 'background' WAV in the Library and chose "Linkage" and I set it to export for actionscript and gave it the handler "backgroundsound".

Then I right-clicked the 'button' WAV in the Library and chose "Linkage" and I set it to export for actionscript and gave it the handler "buttonsound".

Then I made an empty MovieClip by creating a new MovieClip symbol in the Library with nothing in it.

Then I dragged an instance of the empty MovieClip onto the stage and gave it the instance name "bgsound_mc".

Then I dragged another instance of the empty MovieClip onto the stage and gave it the instance name "buttonsound_mc".

Then I made a button symbol in the Library and dragged 4 instances onto the stage. The buttons were given the instance names: "button_btn", "bgmute_btn", "allmute_btn" and "unmute_btn".

I then added static text by each button to remind me which was which.

Once all that was done it was time to add the code.


/* create a sound object for the background sound */
var background_snd:Sound = new Sound (bgsound_mc);
/* attach a sound from the library to the sound object */
background_snd.attachSound ("backgroundsound");
/* create a sound object for the button sound */
var button_snd:Sound = new Sound (buttonsound_mc);
/* attach a sound from the library to the sound object */
button_snd.attachSound ("buttonsound");
/* start the background sound loop and set it to mute as default */
background_snd.start (0, 1000000);
background_snd.setVolume (0);
/* set the button sound to play on button roll-over */
_root.button_btn.onRollOver = function () {
    button_snd.start (0, 1);
};
/* making the mute background button work */
_root.bgmute_btn.onPress = function () {
    background_snd.setVolume (0);
};
/* making the mute every sound button work */
_root.allmute_btn.onPress = function () {
    background_snd.setVolume (0);
    button_snd.setVolume (0);
};
/* making the un-mute button work */
_root.unmute_btn.onPress = function () {
    background_snd.setVolume (100);
    button_snd.setVolume (100);
};


That's it

That's the basics. You can of course use different event handlers such as onRollOver, onRollOut, onDragOver to trigger the sounds or change their volume. You can of course use event handlers to trigger more than one sound, or more than one action, you might start one sound while changing the volume of another at the same time for instance.

It's up to you to be creative, now you know the basics.

Thursday, 19 August 2010

Slider Input With a Difference

Slider or sliding inputs for user interfaces are not new, we get them in desktop software and on the web. But this one is slightly different. Instead of sliding the handle along a bar, the handle stays still and the bar moves. This is helpful when the bar contains measurements that are too big to fit on the screen.

In this example we are pretending to measure height. Just click and drag the pointer to measure.


As you can see the code that prevents the ruler dropping off the end is a bit clunky, but it will do for now.

How to make it

Make a MovieClip of a ruler, with the scale spaced evenly along its entire length - set the registration point to be the bottom-left of the MovieClip. Then make another MovieClip for the ruler pointer - set the registration point to be the bottom-left of the MovieClip too.

Place both MovieClips onto the stage and scale them so that the fit together nicely, but also so the ruler is much much longer than the stage is high.

Give the ruler the instance name 'ruler_mc' and the pointer the instance name 'pointer_mc'.

Then insert the following code onto the first frame of the movie.

The code

The comments will give you some idea of what does what:

var damping:Number = 20;
/*the higher the number the slower the ruler will move*/
var rulerdivisions:Number = 20;
/*this helps us work out the how far the along the ruler you are*/
/*make the rule move when the pointer is dragged on*/
moveruler = function () {
    if (_root.ruler_mc._y >= _root.pointer_mc._y && (_root.ruler_mc._y - _root.ruler_mc._height) <= _root.pointer_mc._y) {
        movefactor = (clickstart - _ymouse) / damping;
        _root.ruler_mc._y += movefactor;
    } else if (_root.ruler_mc._y <= _root.pointer_mc._y) {
        _root.ruler_mc._y = _root.pointer_mc._y;
    } else if (_root.ruler_mc._y - _root.ruler_mc._height) {
        _root.ruler_mc._y = (_root.pointer_mc._y + _root.ruler_mc._height);
    }
    measure = Math.floor ((_root.ruler_mc._y - _root.pointer_mc._y) / (_root.ruler_mc._height / rulerdivisions));
    measure_txt.text = measure+" cm";
};
/*check when the pointer is dragged*/
_root.pointer_mc.onPress = function () {
    clickstart = _ymouse;
    moveRulerInterval = setInterval (moveruler, 15);
};
/*check when the dragging stops*/
_root.pointer_mc.onRelease = function () {
    clearInterval (moveRulerInterval);
};
_root.pointer_mc.onReleaseOutside = function () {
    clearInterval (moveRulerInterval);
};


And that's all there is to it. If you have a neater way of stopping the ruler from dropping off either end, feel free to post your solution as a comment.

Making it useful

If you want to use the input of this interface for something useful, perhaps to base other calculations on it, simply use the 'measure' variable within your formula, to represent the user's input.

Thursday, 5 August 2010

Doodling Program in Flash AS2

Inspired by Dragon's Den this week, when 2 guys demonstrated a fun drawing program they had made, I decided to learn some more about Flash's drawing API to make a very much simpler doodling application in Flash.

Try It


It might look complex, but the hardest bit is only 26 lines of ActionScript, including comments. What makes me laugh the most, is that the whole application comes out as less than 2Kb.

The Code

It's getting late in my time zone, so I won't dissect the code in this post. But enjoy the code, and I'll explain it another time:


//Code from http://dansinteractive.blogspot.com
//default settings
var layernum = 0;
var curcolour:String = "0x000000";
var curlineweight = 5;
//draw the line
drawline = function () {
["layer"+layernum+"_mc"]lineStyle(curlineweight, curcolour, 100);
["layer"+layernum+"_mc"]lineTo(_xmouse, _ymouse);
};
//start drawing on mouse press
_root.paper_mc.onPress = function() {
layernum += 1;
startx = _xmouse;
starty = _ymouse;
createEmptyMovieClip("layer"+layernum+"_mc", this.getNextHighestDepth());
["layer"+layernum+"_mc"]moveTo(startx, starty);
drawlineInterval = setInterval(drawline, 10);
};
//stop drawing on mouse release
_root.paper_mc.onRelease = function() {
clearInterval(drawlineInterval);
}
_root.paper_mc.onReleaseOutside = function() {
clearInterval(drawlineInterval);
}
//colour selector
_root.black_mc.onPress = function () {
curcolour = "0x000000";
}
_root.blue_mc.onPress = function () {
curcolour = "0x0000FF";
}
_root.cyan_mc.onPress = function () {
curcolour = "0x00FFFF";
}
_root.green_mc.onPress = function () {
curcolour = "0x00FF00";
}
_root.magenta_mc.onPress = function () {
curcolour = "0xFF00FF";
}
_root.red_mc.onPress = function () {
curcolour = "0xFF0000";
}
_root.white_mc.onPress = function () {
curcolour = "0xFFFFFF";
}
_root.yellow_mc.onPress = function () {
curcolour = "0xFFFF00";
}
//line thickness selector
_root.line1_mc.onPress = function () {
curlineweight = 1;
}
_root.line3_mc.onPress = function () {
curlineweight = 3;
}
_root.line5_mc.onPress = function () {
curlineweight = 5;
}
_root.line10_mc.onPress = function () {
curlineweight = 10;
}


Happy doodling.

Monday, 2 August 2010

Simpler Click and Drag Rotation in Flash AS2

Although this is more lines of code, the code is easier to follow.

The last example used trigonometry to calculate the angle of rotation and gave a realistic simulation of dragging an object in a circle. This is much more basic, and sets the rotation of the object based on a horizontal drag only.

The Script

/* sets the starting point for the maths that follows */
var objectnewdeg = 0;
var objectdeg = 0;
var mindeg = 0;
var maxdeg = 300;
/* this function rotates the object live as the user drags */
rotateobject = function () {
/* this checks whether the user is rotating within the max and min rotation factors defined in the variables above, it only allows rotation if it is within the set limits, otherwise the object won't move */
if (objectnewdeg>=mindeg && objectnewdeg<=maxdeg) {
curpoint = _xmouse;
objectnewdeg = objectdeg+(curpoint-objectstartdeg);
_root.object_mc._rotation = objectnewdeg;
}
}; 

/* This starts the object rotation function and sets the starting point of the user's click - all rotation is then based on the difference between where the user first clicks and where they drag to */
_root.object_mc.onPress = function() {
objectstartdeg = _xmouse;
objectrotInterval = setInterval(rotateobject, 10);
}; 

/* This stops the rotation as soon as the user let's go. It also checks that the user has not been able to drag further than the min or max limits before the code could correct them, and if they have, adjusts the rotation to fit within the limit boundaries */
_root.object_mc.onRelease = function() {
clearInterval(objectrotInterval);
if (objectnewdegmaxdeg) {
_root.object_mc._rotation=maxdeg;
objectnewdeg = maxdeg;
}
objectdeg = objectnewdeg;
};

/* This is the same as the function above, but executes if the user has drifted off the object when they stop dragging */
_root.object_mc.onReleaseOutside = function() {
clearInterval(objectrotInterval);
if (objectnewdegmaxdeg) {
_root.object_mc._rotation=maxdeg;
objectnewdeg = maxdeg;
}
objectdeg = objectnewdeg;
};


While this code may have more lines, it's much simpler to follow. In addition it also allows you to set a maximum and minimum rotation factor, so you can set how far you want the user to be allowed to rotate the object in either direction.

To use it, simply paste it into frame 1, and create and MovieClip on the stage with the instance name 'object_mc'.

Try It


Making it Useful

Let's say you wanted to use this to make a user input for a program. The user rotates the object (say a dial or a volume knob) and you want to use the numerical value of the object's rotation for something. Nothing could be simpler.

If you want the numerical value only once the user has stopped dragging then base your program on the variable objectdeg.

If you want the numerical value to constantly update as the user drags, then base your program on the variable objectnewdeg.

Click and drag rotation in Flash AS2

In Flash I often find that some things which seem hard, are easy, and some things which ought to be easy are hard. Making things rotate when you click and drag them is, for me, one of the latter. It doesn't take much code, but figuring the code out hurt my brain.

You'd think this would be easier - you'd think there would be a class already in existence for this. But as there isn't here's an ActionScript 2 solution.

The Script With Comments

The comments explain how it works:

/*sets starting points for the maths that comes later*/
var objectnewdeg = 0;
var objectdeg = 0;
/* This is the Rotate Object function, it updates the rotation of the object continuously as the user drags */
rotateobject = function () {
    curpoint = (Math.atan2(_root._ymouse-_root.object_mc._y, _root._xmouse-_root.object_mc._x)/Math.PI)*180;
    objectnewdeg = objectdeg+(curpoint-objectstartdeg);
    _root.object_mc._rotation = objectnewdeg;
};
/* This initiates the
Rotate Object function when the user clicks on the object */
_root.object_mc.onPress = function() {
    /* This finds the position around the object that is first clicked in degrees and sets it as a variable that is used in the function above */
    objectstartdeg = (Math.atan2(_root._ymouse-_root.object_mc._y, _root._xmouse-_root.object_mc._x)/Math.PI)*180;
    /* starts the function above and sets the repeat frequency as 10 */
    objectrotInterval = setInterval(rotateobject, 10);
};
/* This stops the
Rotate Object function when the user releases the object, so it stays where the user left it, then records the new rotation of the object as objectdeg ready for when it is rotated again. */
_root.object_mc.onRelease = function() {
    /* stops the function above */
    clearInterval(objectrotInterval);
    /*records the new rotation of the object as set by the user's drag as variable objectdeg, ready for next time they drag */
    objectdeg = objectnewdeg;
};
/* This is almost a repeat of the release code above, but takes account of the fact the user might drift off the object when they drag it, hence onReleaseOutside. */
_root.object_mc.onReleaseOutside = function() {
    /* stops the function above */
    clearInterval(objectrotInterval);
    /* records the new rotation of the object as set by the user's drag as variable objectdeg, ready for next time they drag */
    objectdeg = objectnewdeg;
};


The Script Without Comments

And if that code above looks scary, it's not so bad without comments - only 19 lines.

var objectnewdeg = 0;
var objectdeg = 0;
rotateobject = function () {
curpoint = (Math.atan2(_root._ymouse-_root.object_mc._y, _root._xmouse-_root.object_mc._x)/Math.PI)*180;
objectnewdeg = objectdeg+(curpoint-objectstartdeg);
_root.object_mc._rotation = objectnewdeg;
};
_root.object_mc.onPress = function() {
objectstartdeg = (Math.atan2(_root._ymouse-_root.object_mc._y, _root._xmouse-_root.object_mc._x)/Math.PI)*180;
objectrotInterval = setInterval(rotateobject, 10);
};
_root.object_mc.onRelease = function() {
clearInterval(objectrotInterval);
objectdeg = objectnewdeg;
};
_root.object_mc.onReleaseOutside = function() {
clearInterval(objectrotInterval);
objectdeg = objectnewdeg;
};


Copy and paste the code into the first frame. Then place a MovieClip on the stage and give it the instance name 'object_mc'.

Test the movie and you should be able to click the object anywhere and drag it to rotate it.

The centre of rotation is the Registration point that you set when you made the object into a MovieClip.

If you want to re-use the code yourself, just replace every instance of the name object_mc with the instance name of your object.

Try It


Applying it to something useful

I originally developed this for use with my VirtualCompass teaching aid This uses drag rotation to allow the user to position several different elements on the screen.

Thursday, 18 February 2010

True Full Screen in Flash Player 7 or 8

Most flash based video players have a "full screen" option that makes the video fill your screen even if it originated from a small square in a web page.

But it can be used to make any SWF file fill the screen.

I use both MX 2004 or CS3 depending on which computer I am using. And I know there are still a lot of MX or 8 users out there. So, in case I forget, and in case anyone else finds it helpful, here's how you do full screen in MX 2004 or 8.

The whole thing is summed up in detail here:
http://www.adobe.com/devnet/flashplayer/articles/full_screen_mode.html

The ActionScript

Here is my AS2 implementation:

/*first set the initial fullscreen value which is 0 because we are not yet in fullscreen */
var fullscr_status = 0;
/*Then a function that runs when the fullscreen button is pressed, this tests whether we are in fullscreen (1) or not (0). If not we go into fullscreen mode. If allready in fullscreen mode we come out of it. */
_root.button_btn.onRelease = function() {
if (fullscr_status == 0) {
//Fullscreen on
fullscr_status = 1;
Stage["displayState"] = "fullScreen";
} else if (fullscr_status == 1) {
//Fullscreen off
fullscr_status = 0;
Stage["displayState"] = "normal";
}
};

The thing that is different for MX 2004 and 8, when compared to using ActionScript 2 in CS3 is this:

Stage["displayState"] = "fullScreen";

and

Stage["displayState"] = "normal";

these are different in CS3.

The HTML

The fullscreen ActionScript won't have any effect unless the object and embed parameters are set to allow fullscreen as follows:

For object:

param name="allowFullScreen" value="true"


For embed:

allowFullScreen="true"


The HTML object and embed I use is described on the Adobe site here:
http://www.adobe.com/devnet/flashplayer/articles/full_screen_mode_04.html

An Example

Just click the square.


Wednesday, 9 December 2009

Custom Snow Effect in Flash

Whether or not we get a white Christmas outside, I can make sure I get one in my Flash work any time I like.

Components add to the functionality of Flash, basically making more complex actionscripts available to those of us who lack the time or the knowledge to program them ourselves. The Adobe Exchange is a great place to find components for Flash from MX right through to CS4, some free, some you have to buy.

Free Snow Effect Component

The component I want to tell you about is the free Snow Flash Effect component from FlashWanted by Corso Ria.

Download it here (you will need to get a free Adobe Exchange account):

http://www.adobe.com/cfusion/exchange/index.cfm?event=extensionDetail&extid=1278523

Once downloaded just double click the MXP file and it will automatically install into the Flash components panel.

This particular component works with Flash versions MX 2004, MX 2004 Pro, 8 and CS3 (and maybe CS4 but I haven't tested it), so if you don't have access to the latest version of Flash, this should still work for you. In fact i'll be using MX 2004 to show you how it works since I don't have CS3 on this machine and I can't be bothered to pull the laptop out - it's really easy.

Basic Snow

To kick off you need to open the Components panel, and then open the FlashWanted group. In there you will find a component called "sneg".

Drag "sneg" to the stage and scale it to cover the area you want to be snowy.

Then, with the instance of the "sneg" component you dragged onto the stage selected, you need to open the Component Inspector.

Most of the fields in the Component Inspector are pretty self explanatory, and a bit of experimenting with the settings will give you the effect you want. You can even make the background transparent by changing the alpha setting, allowing you to overlay the snow over other layers.

And that's it.

CTRL+ENTER to test the movie and the snow begins to fall.

Customising the Snow

By default the snow is made up of very small white dots, but you can use your own flake design by using a symbol from your library.

To do this you need to first make a MovieClip to use as a snowflake, and then set it to export for actionscript. Do this by right clicking the symbol in the Library, and choosing the Linkage option.

Then set the identifier, what you type here is what you will also type in the Library Symbol field in the Component Inspector. I used 'flake_mc' as the identifier in mine.

Feel free to test away.

Further Customisation

If you are like me you will always be curious about how far you can push the technology beyond its original or obvious intention. I have seen other snow effect components in use that had more than one type of snowflake and allowed the snowflakes to tumble, or turn, as they fell.

It seemed pretty logical that, if I am specifying a MovieClip as a snowflake, any actionscript within that MovieClip that refers to the clip itself, ought to work. And, I was right.

In the previous step we looked at how the component allowed us to specify a particular MovieClip to use as a snowflake, rather than its own default 'dot'. What this means is that we can actionscript our snowflake MovieClip to apply certain attributes to itself, and this actionscript will work independently for each flake the component places on our stage.

In other words we can make 'intelligent' snowflakes to make up for where the component lacks. While the component takes care of the snow falling, each flake takes care of its own turn speed and appearance etc.

Here's how.

Random Flake Appearance

I am going to cheat a little here, this script will not actually generate random flakes, but what it will do is randomly choose a snowflake design from a selection that you will make.

What I did was make 5 different snowflakes and place each one on a different keyframe within a MovieClip called 'snowflake_mc'. Don't forget to put a stop(); action on each of these keyframes or your flakes will keep cycling through the 5 designs as they fall (which doesn't happen in real life). It's also a good idea to make sure each snowflake on each frame is positioned over the 'centre point' in the middle of the MovieClip symbol.

So what I end up with is a MovieClip called 'snowflake_mc' containing 5 frames, each frame containing a different snowflake design and a stop(); action.

The next stage is to open the symbol we specified in the Component earlier - flake_mc. Inside flake_mc you need to swap the snowflake design with the MovieClip you just made containing 5 flakes. Give this the instance name of 'snowflake_mc'. So what we end up with is a symbol called 'flake_mc' that is set to export for actionscript that contains another symbol called 'snowflake_mc' that contains our 5 flake designs.

Now for the actionscript. This goes on the first frame of 'flake_mc':


/*randomly select which flake design to use */
var flakedes = Math.ceil(Math.random()*5);
/*set flake design to the one selected */
snowflake_mc.gotoAndStop(flakedes);

First we create a variable called 'flakedes' that is a randomly generated number between 1 and 5. we do this because we have 5 flake designs. This then acts as a random flake selector. We generate the number using Math.random, but this only gives us a number between 0 and 1. To turn this into a number between 1 and 5 I multiply it by 5 and then round it up using Math.ceil. (If I rounded down I would get a number between 0 and 4, rounding up guarantees between 1 and 5).

Then we tell the 'snowflake_mc' MovieClip (the one with 5 frames) to gotoAndStop at the frame number we just randomly generated. This then randomly displays on of our 5 flake designs.

Voila! As the component places a new flake on the stage the appearance of the flake is now randomly one of the 5 designs you made.

Flake Tumbling

This requires trickier actionscript (but still easy), but no extra graphics. A pure code solution to flake tumbling. This goes on the first frame of 'flake_mc' beliw the code we already have:

/*Generate a random small number of equal chang of being positive or negative. Positive equates to clockwise rotation, negative anti-clockwise */
var rotfactor = ((Math.random()*4)-2);
/* This function tells the snowflake_mc movieclip within the flake_mc clip to rotate by the rotfactor. */
function snowflakeroll () {
snowflake_mc._rotation += rotfactor;
}
/* this runs the above function every 40 milliseconds. */
setInterval(snowflakeroll, 40);

I wanted the flakes to tumble very slowly, all at different speeds of slowness, and in either direction. So the first part generates a small number, between -2 and 2. A negative number will equate to anti-clockwise tumbling, a positive number clockwise tumbling. We generate this number again using Math.random but this time we multiply the number by 4, to give us a random number between 0 and 4, but then we -2 from that number giving us a random number between -2 and 2.

We use this number as the variable 'rotfactor'.

What we then want to do is use the value of 'rotfactor' as the amount the snowflake will rotate each frame.

However within the MovieClip inside the component onEnterFrame doesn't work. So instead we approximate frames by using setInterval.

setInterval works by calling a function repeatedly, with an interval between each call. If we set the interval small enough it will be as good as calling each frame.

First then we have to write the function, then use setInterval to call the function.

Our function is very simple:

function snowflakeroll () {
snowflake_mc._rotation += rotfactor;
}

First we define the function and give it a name 'snowflakeroll', then we give the function its instructions which in this case is to tell the 'snowflake_mc' MovieClip to change its rotation value by 'rotfactor'. By using += rather than just = we add rotfactor to itself each time the function is called so it gets larger each time thereby increasing its angle of rotation with each call of the function.

Then we just need to call the function using setInterval:


setInterval(snowflakeroll, 40);


We call the function by name, and then we define the interval in milliseconds. In this case 40 milliseconds calls the function frequently enough to creat a smooth rotation animation.

And that's it

And that's it. You're done. You have now got a basic component that simply chucks snow out, to give you random flakes with random tumbling speeds both clockwise and anti-clockwise.

Given all that we have done, I think it safe to assume they don't have to be snowflakes. What other MovieClips could it chuck out, and how could these be scripted? Over to you.

Happy Christmas.

Monday, 9 November 2009

Flash Projects #7 - Making a Flash MP3 Player

Finally here is the solution. It turns out you can use NetConnect and NetStream to make an MP3 player in Flash, but only if you encapsulate all your MP3s as FLV files. Not really very helpful since it means converting your MP3 files - it just makes more work.

And busy designers really don't want the job to take longer.

However there is another way to make an MP3 player in Flash, that still gives us all the control we need, but the pausing and playing is just a tad more complicated. But nothing you can't handle I am sure.

The Code

First, here's the code, then I will explain it:


//set default starting position for playback in seconds
var playpoint = 0;
//create sound object
var audio_sound:Sound = new Sound();
//play button
this.play_btn.onPress = function() {
//play the mp3 from the point defined in the variable playpoint
audio_sound.start(playpoint);
};
//pause button
this.stop_btn.onPress = function() {
//define the variable playpoint as the same as the current position, this is given in milliseconds so we divide it by 1000 to convert it into seconds
playpoint = (audio_sound.position/1000);
//stop the playback
audio_sound.stop();
};
this.m1_btn.onPress = function() {
audio_sound.loadSound("track1.mp3", false);
//true = streaming and therefore autoplay, false = not streaming and therefore just sets the file for when you hit the play button.
};
this.m2_btn.onPress = function() {
audio_sound.loadSound("track2.mp3", false);
};


The Explanation

Here goes. First, instead of using NetConnect and NetStream as we did for the video player, we are going to use loadSound. This still gives us a fair amount of control, in some ways more than the NetStream would give us, but it doesn't automatically pause when you play something that is already playing, as NetStream does. So while the rest is no more difficult, just different, pausing and then playing again is slightly more complicated using loadSound.

As with any program, we can only work with the information available, or that we can find out. With the loadSound approach we can find out one very important thing that will help us make a pause/play mechanism - we can find out our current position in the MP3 as it plays. In the code above we do this as follows:


audio_sound.position


Not hard, but on its own it is not a pause/play mechanism. We make it into a pause/play by storing the current position as a variable called playpoint at the time of pause. In effect we remember where we got up to. Then, when we play, we tell it to play from where we left off by asking the variable playpoint to tell us where we got to. As follows:

When pausing:


this.stop_btn.onPress = function() {
playpoint = (audio_sound.position/1000);
audio_sound.stop();
};


First we set the variable playpoint to store our current position. This is actually given in milliseconds so we divide it by 1000 to convert it to seconds - and that's what you see being done here. Then we tell it to stop.

When resuming playing:


this.play_btn.onPress = function() {
//play the mp3 from the point defined in the variable playpoint
audio_sound.start(playpoint);
};

We simply tell it to start, but include the start position as playpoint so it resumes from where we left off.

Isn't that what pausing/playing really is? Stopping, and then starting from where you left off?

The other code is effectively a menu, allowing you to choose which track to listen to. The term false on the end means the track won't play straight away, but will wait for you to press play as well. Change the false into a true and just clicking on the menu will make the track start as well.

Have fun.

Monday, 28 September 2009

eLearning Business Game (Arrays in action)

My last post was all about my array sorting problem. But I thought you might want to see the final product.

It was actually a game I put together to help my new students relax and get to know each other, but then I tweaked it and made it available for anyone to download.

Available here: http://digitalarena.co.uk/teach/markettraders/

The array was used in the part of the game that displays the team's performance as a graph. I needed to find a way to make the graph always fit in the available space. That meant finding the highest score and then working out a scale ratio that I could apply as the graph drew, so it always fit in the graph space.

So what has this to do with arrays? Well... finding out the absolute highest score of each team's highest score meant storing them all in an array and then sorting them (lowest to highest). Then I just had to retrieve the last item in the array to get the highest.

Friday, 25 September 2009

Sorting Numeric Arrays with Actionscript

Just lately I have been having fun with arrays. Of course, I say "having fun", what I mean is having problems. Especially with sorting numerically.

Arrays are really useful, they allow you to store data, select data, order it, etc. You can create them from strings and other variables, and turn them into strings and other variables. All in all, they can be very handy.

I found them handy as part of a game I was writing a couple of days ago. As part of my code I needed to find the number with the highest value out of a choice of 3 numbers. The logical solution was to put all 3 numbers into an array, then sort them numerically, then retrieve the last item in the array (this should, after sorting, be the one with the highest value).

Numeric sorting is not numeric

Let's say we start with the following array:

var my_array:Array = [650,12,86];

Then we sort them numerically:

my_array.sort(Array.NUMERIC); //doesn't work correctly

After this command you might expect flash to order the array as:

12, 86, 650

But what you actually get is:

12, 650, 86

This is because, as the Flash documentation explains, 'Numeric fields are sorted as if they were strings, so 100 precedes 99, because “1” is a lower string value than “9”. '

In other words, the Numeric sort does not sort numerically at all. It sorts alphabetically. Odd sort of numeric, but it can't be helped, we have to find a solution.

Prepending 0s so all values have the same number of digits

Of course this only happens because not all the values had the same number of digits. If the lower values began with a 0 then a numeric (alphabetical) sort would work correctly. So my initial plan was to use an if statement in a for loop to check for 1 digit, 2 digit and 3 digit numbers and prepend (put in front) 0s to make them all the same number of digits as follows:


for (var i = 0; i<finalscores_array.length; i++) {

if (finalscores_array[i]<=9) {

finalscores_array[i] = "000"+finalscores_array[i];

} else if (finalscores_array[i]<=99) {

finalscores_array[i] = "00"+finalscores_array[i];

} else if (finalscores_array[i]<=999) {

finalscores_array[i] = "0"+finalscores_array[i];

} else {

finalscores_array[i] = finalscores_array[i];

}

}


With for loops we can repeat a peice of code until a condition is met. This loop repeats for the length of the array (that's the number of items in the array). It starts by checking how many digits the first array item has. Then depending on how many digits the code prepends 3, 2, 1 or no 0s. On the next repetition it checks the next array item, and so on until all array items have been checked and had the required number of 0s prepended so that they all have the same number of digits, and then the loop ends.

The result is that the original values:

650, 12, 86

become

0650, 0012, 0086.

Now when we sort them numerically, it does put them in the right order:

0012, 0086, 0650.

Leading 0s alter the value (it's a decimal v. octal thing)

Wouldn't it be great if that was the end of your troubles?

The problem is that if we then want to do anything with the values afterwards, like doing anything other than displaying them, we need to remove the 0s we just added. And it is not nearly as easy taking off, as putting on.

The reason we have to remove the leading 0s is because Flash, like lots of other programs, does not treat numbers beginning with 0 as decimal numbers. It treats them as octal. This means that 0650 does not have the same value as plain old 650 (without the leading 0).

0650, as octal, actually has the decimal value of 424.

0650 is in fact a totally different number to 650.

So while prepending leading 0s solves our array sorting problem, it actually changes our values. just because a leading 0 in Flash means it is an octal value, not a decimal value.

Leading 0.0 do not alter the value (it's a less than 1 thing)

But then I realised. Hang on a minute says I (yes, programming problems really can have you doing a good Ben Gunn impression). Hang on a minute says I, Flash handles numbers begining with a 0 all the time. What about 0.1, 0.2 etc. It has no problems with decimal values of less than 1.

And here is my solution. Instead of using my for loop to prepend just 0s, I will use it to prepend 0.0s, as follows:


for (var i = 0; i<finalscores_array.length; i++) {

if (finalscores_array[i]<=9) {

finalscores_array[i] = "0.000"+finalscores_array[i];

} else if (finalscores_array[i]<=99) {

finalscores_array[i] = "0.00"+finalscores_array[i];

} else if (finalscores_array[i]<=999) {

finalscores_array[i] = "0.0"+finalscores_array[i];

} else {

finalscores_array[i] = "0."+finalscores_array[i];

}

}


The result is that the original values:

650, 12, 86

become

0.0650, 0.0012, 0.0086.

Now when we sort them numerically:

my_array.sort(Array.NUMERIC);

It does put them in the right order:

0.0012, 0.0086, 0.0650.

OK, I know that doing this has changed the values too, but at least they are still decimals (not a totally different numbering base). Because they are still decimals it is easily rectified, it's just a case of shifting the decimal point a few places. And we can do this by very simple multiplication...

...just multiply them by 10,000.

0.0012 x 10000 = 12
0.0086 x 10000 = 86
0.0650 x 10000 = 650

So, to finish off, now we have prepended 0.0s to our original values, then sorted them, all I need to do to get the highest value is retrieve the last item from the array, and multiply it by 10000.

var highestscore:Number = (my_array[my_array.length-1])*10000;

The Faster Way

Having made this wonderful discovery, it is good to know that all the code required to debug and investigate the problem is not necessarily needed to apply the solution. Pre-pending using the IF and ELSE IF is only necessary if you want to pre-pend digits to a String (as in converting 650 to 0650). Now that we have discovered that only decimals (as in 0.650) will sort correctly there is a much simpler way to achieve this.

Simply - divide the original number by 10000 (after all, we convert them back by multiplying them by 10000).

for (var i = 0; i<finalscores_array.length; i++) {

finalscores_array[i] = finalscores_array[i] / 10000;
}

I count that as 7 lines fewer code, than the pre-pending method.

That's the difference between what we do to understand a problem and what we do to apply a solution.

And there we have it. Hopefully some of you will find this helpful. Frankly I don't know why numeric sorting doesn't just work. But since it doesn't, here is a cheap and cheerful workaround - in summary:

1. Divide them all by 10000 (so that every number begins "0.")
2. Sort them
3. Multiply them all by 10000 (so you get the original values back)

Happy sorting.